How-to
How to Carve a Foam Pumpkin That Lasts for Years
How to carve a foam craft pumpkin with a stencil: which pumpkins to buy, the tools that cut clean, why to skip the hot knife, and how to light it safely.

Somebody patented a carvable fake pumpkin in 1996. Jeffrey Chapman’s patent describes a pumpkin shell of sprayed foam, about an inch thick, that’s “suitable for carving with simple tools.” The pitch was a jack-o’-lantern you could carve once and keep.
Thirty years later you can buy one at a craft store for a few dollars. Carve it this October and the same jack-o’-lantern comes out of a box next September, no rot, no mushy face. Here’s how to do it without wrecking the pumpkin or your lungs.
Buy one that says “carvable”
Not every foam pumpkin can be carved. Some are solid all the way through. Chas Greener, who carves them at Chas’ Crazy Creations, warns that “some foam pumpkins are not hollow inside,” so look for the word “carvable” on the label.
Michaels sells a carvable craft pumpkin line that says it “has a hollow interior so that you can carve, paint, and decorate it.” This fall the small ones started around $5. Dollar Tree lists little carvable foam pumpkins too, about 5.5 inches tall. You’ll also see the brand name Funkins, which plenty of people still search for.
A lot of people call these styrofoam pumpkins. The patent describes polyurethane foam, but stores don’t say what’s in theirs, so go by the label, not the name.
Get one big enough for your design. My stencils print one design per letter-size page, which suits a medium pumpkin, and you can scale them up or down in your printer settings.
Tools that cut clean
Start with a small serrated knife. Chas calls a cheap one “the best tool for carving foam pumpkins.” Add a craft or utility knife for tight corners.
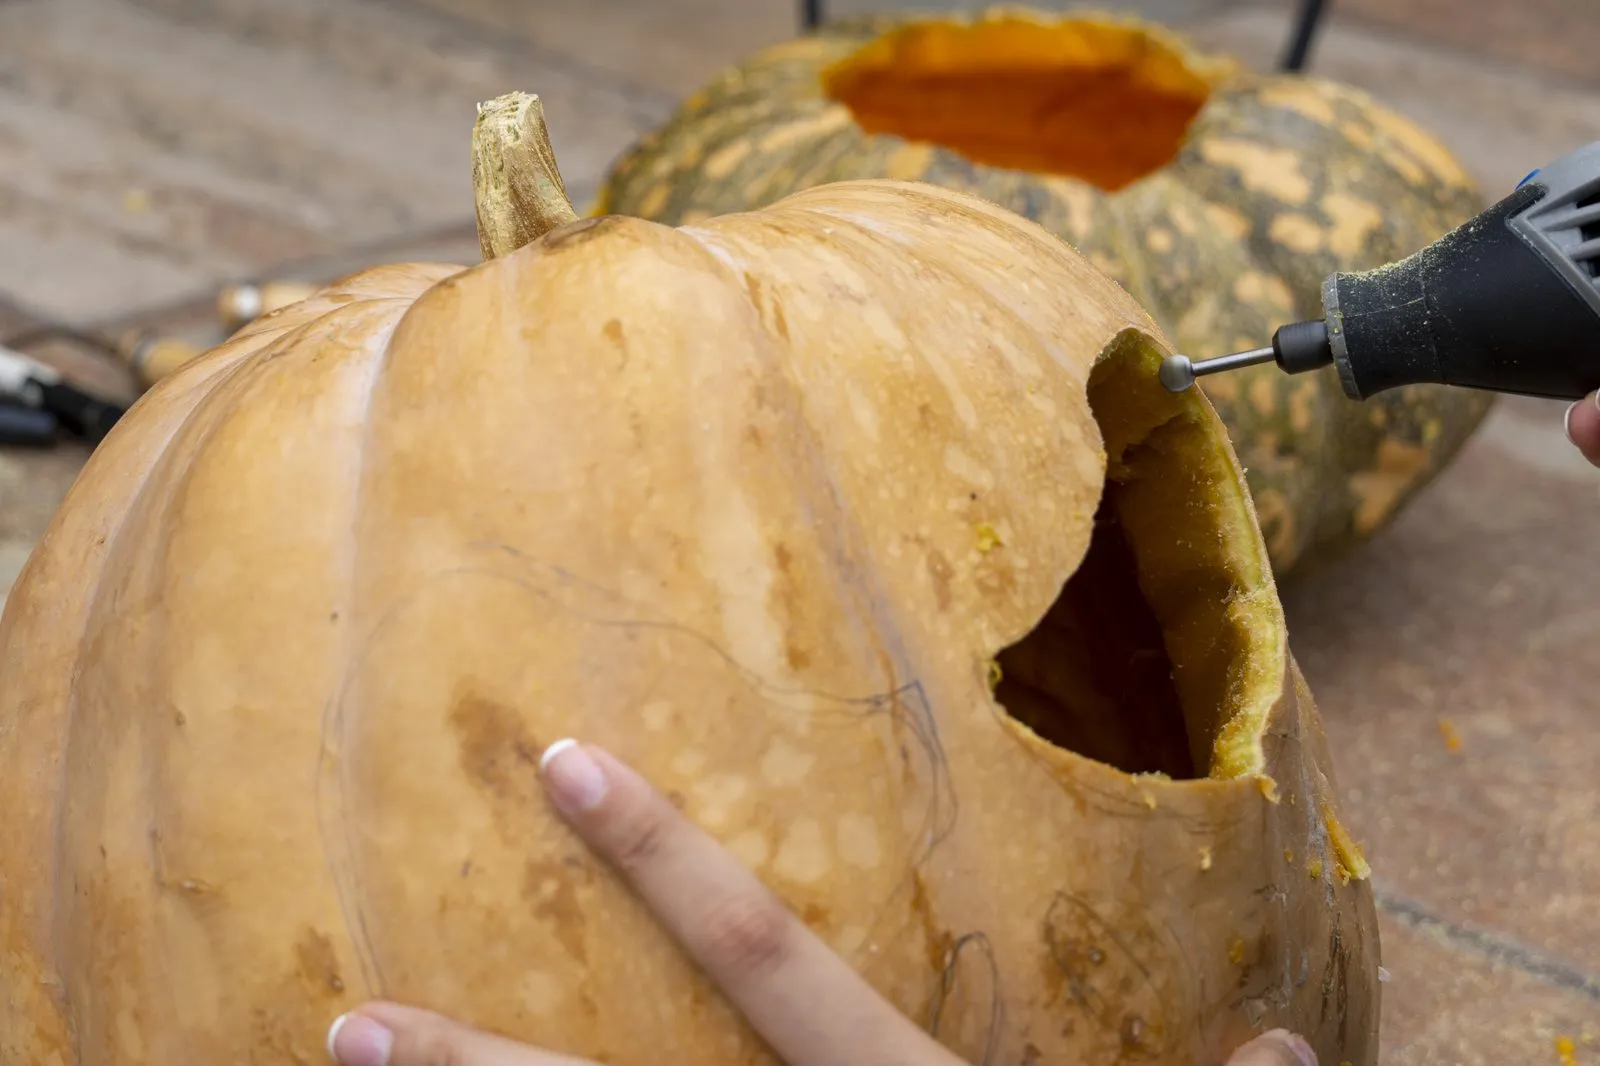
For detail and shading, a rotary tool like a Dremel with a small bit does the job. That’s how Barb at Made by Barb does her fine work. The photo below shows one cutting a real pumpkin, and it handles foam the same way.
Keep sandpaper or a nail file nearby to smooth the cut edges.
One thing that didn’t make the list: the little saw from a pumpkin carving kit. Chas tried one first and wrote that it “did not work.”
Skip the hot knife
Some tutorials say to use a hot knife or a hot wire cutter. Please don’t. The American Chemistry Council says polyurethane can start breaking down at about 300 to 360°F, and the gases it gives off can include hydrogen cyanide and isocyanates.
Hydrogen. Cyanide. From a Halloween craft.
A sharp blade is slower, and it’s fine. Do the slow thing.
Cutting foam also makes a fine dust that gets into everything, like glitter after a church craft night. Barb’s advice is to “have a vacuum very very close by and wear a dust mask.” Safety glasses are a good idea too.
Cut the hole in the bottom
Real pumpkins get a lid on top because you have to scoop them out. Foam has no guts, so put the access hole in the bottom instead. The pumpkin sits flat over a battery light, and the top and stem stay clean.
If your light has a cord, cut a small hole in the back so the cord can run out.
Get the stencil onto the foam
The tape-and-poke method works on foam the same way it does on a real pumpkin.
- Tape the stencil to the flattest side. Snip the paper edges so it lies against the curve.
- Poke along every line with a push pin, holes close together.
- Peel the paper off and connect the dots with a pen.
- Cut just inside the pen line. Pen won’t come off foam (one crafter found even acetone leaves it), so you want the cut to swallow it.
Barb has another way: print the design on thin paper, glue it flat with watered-down white school glue, let it dry, and carve right through the paper. The stencil guide has the full method for real pumpkins.
Buyers have used my stencils this way. One wrote that a design was a “perfect fit” for their foam pumpkins.
How foam is different
The wall is thinner. Barb measured about 3/8 of an inch on her Michaels pumpkins, so you’re cutting through less than you would on a real one.
There’s no rush, either. Foam doesn’t rot, so you can carve in August, take a week off, and finish whenever you want. Carve the inside pieces first and the big outer shapes last, same as always.
Mistakes are easier to live with too. Sand a rough edge smooth, and if a piece chips, Barb patches hers with hot glue or craft adhesive.
Shading: the trick foam does better
Under the orange skin, the foam is white. That means you can shade. Leave the dark parts of the design uncut, shave the skin thin where you want a soft glow, and cut all the way through only where you want it brightest.
Barb’s rule is “the thinnest is the lightest and the uncut is the darkest.” Her other rule matters more: “You can always carve deeper but not replace, so go slow.”
Light it with LEDs only
Foam can catch fire. Chas puts it plainly: “Do not use a real candle in these foam pumpkins, the flame will light the pumpkin on fire.”
Use a battery light or a glow stick, which is what the Consumer Product Safety Commission recommends for real pumpkins anyway. Barb likes LEDs because “they do not have any heat.”
Put it away for next year
Crafters reuse these year after year. One commenter on a foam carving tutorial kept theirs outside for about four years as a scarecrow’s head, and wrote that “rain, frost, and even snow have done nothing to it.”
Indoors is still the safer bet. Wrap it in a towel, box it up, and keep it somewhere that doesn’t bake in summer. A hot attic is no place for anything you want to keep.
If you’re entering it in a contest, check the rules first. Some contests only allow real pumpkins.
For designs, words and simple shapes make good pieces to keep for years. The Halloween Words set and the Simple packs are a good place to start.